Friday, June 8, 2012

That's Sooome Fish!


With all of the abundance growing rapidly around us, it's been hard for me to narrow down what I want to write about.  I decided to go with what's got my keenest attention at the moment.  It isn't even something grown locally, but it is something that is in the peak of its season...Copper River Salmon.

I was first introduced to this amazing fish by some dear friends while I was visiting Seattle a few years ago.  After the first bite my opinion of salmon was forever changed.  It became clear to me why I had never before been much of a fan of salmon, as I had never before eaten salmon that was so delectable.  Although, like any good Wisconsin girl, I am very particular about the style and preparation of my Friday fish fry, I had never given much thought to the quality and variety of fish I consumed.

Where?
The Copper River, ranked 10th largest in the world, is a 300 mile river in south-central Alaska that has an extensive delta ecosystem and abundant runs of wild salmon.  Due to the size, terrain, and cold waters of the river, the fish who traverse these 300 miles to their spawning grounds are very strong and develop flesh rich in omega-3 fatty acids, Vitamin D, and protein. All of this equates to an incredibly rich, nutty flavor and velvety melt-in-your-mouth texture, making them some of the most prized salmon in the world.


Meet the fish!
Copper River King Salmon from www.alaskadispatch.com
The varieties of Copper River salmon include King (Chinook), Sockeye (Red), and Coho (Silver).  King is exactly as its name suggests.  It is the largest of the species and, in my opinion, the most luxurious on the plate and palate.  Its rich reddish-orange color makes it a clear standout in any fresh fish case.  It is loaded with healthy, flavorful fats and has a silky yet firm texture.  This fish is a heavy hitter price-wise, and it is also a fish you can, and should, enjoy as is.  When was the last time you ate fish that could hold its own on your plate with minimal seasoning and certainly without being wrapped in puff pastry, battered and fried, or swimming in some kind of sauce?  Copper River King has the shortest commercial season from mid-May through mid-June.

From www.copperriversalmonwholesale.com


Sockeye is a smaller version of the King, sporting the same rich color, a firmer texture,  lower fat content (though it's still quite high), and full flavor.  Copper River Sockeye season runs longer than King, from mid-May through July.  Sockeye is a good compromise between flavor and price.
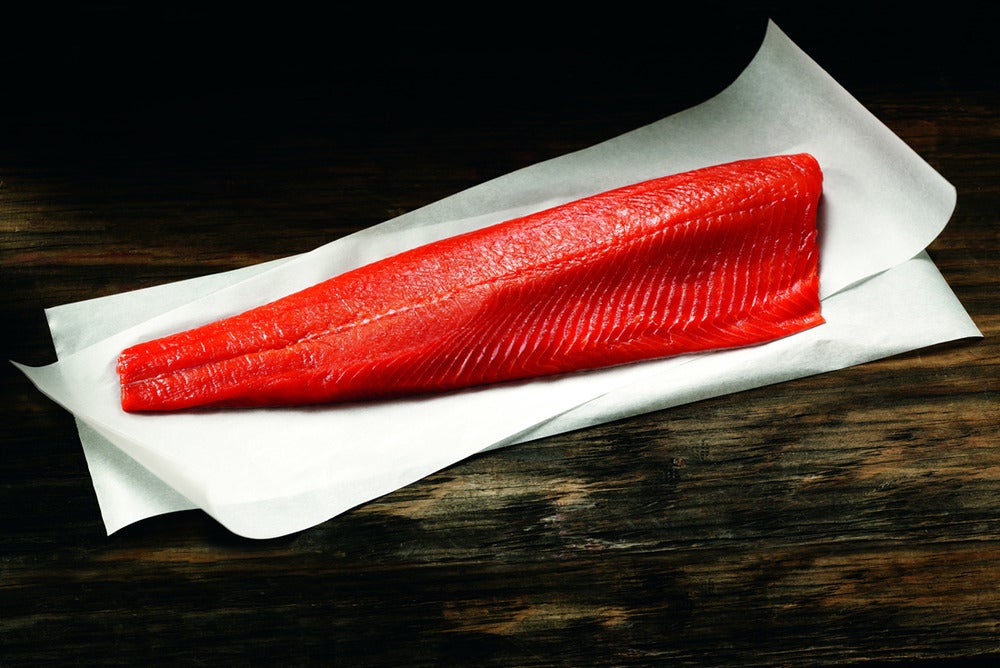


I can't get enough of the color of this fish!!  www.copperriverfishmarket.com


www.copperriversalmon.org


Coho salmon is a late season fish, August through September, mild in flavor, firm in texture, even smaller in size, and lends itself well to grilling and use in other recipes, such as chowders and soups.


The Challenges
If you thought our conventional meat industry was bad (watch Food, Inc.), the fishing industry is even worse, but it's not something we hear much about.  Slowly but surely more attention is being paid to preserving our waterways and restoring the horribly disrupted marine ecosystems throughout the world.  The absence of regulations and increased over-fishing in order to meet uneducated consumer demands, has lead to devastating reductions of fish populations, almost to the point of extinction in some cases...Chilean Sea Bass and Bluefin Tuna are two examples. The bandaid answer to this growing problem was the establishment of aquaculture or fish farming.   Despite very few exceptions (e.g. locally closed loop farmed Tilapia from Falcon Aquaponics in Slinger, WI), fish farming has gone the way of CAFO meat production, destroying the environment and producing fish that are unhealthy in their own right (diseased, injured, and stressed due to cramped living spaces and poor nutrition) as well as to those who consume them...meaning us.

Unfortunately, not all seafood watch groups are created equally.  Again, due to limited regulations, some organizations are commercial and effected by lobbying and ad money and yet other businesses who claim to offer consumer assistance in the fresh fish case with helpful signage, simply change the criteria of what "best", "good", and "avoid" means to suit their needs. 

Though I am a locavore at heart, eating seasonally and sustainably is of equally high importance. Purchasing Copper River Salmon, while it's in season, fits my criteria for responsible consumption.  Alaska has made huge strides in sustainable fishing regulations, making it almost a guarantee that fish caught by professional Alaskan fishermen will ensure that the fish were caught during their appropriate season and in a sustainable manner.

The bottom line is that finding sustainably fished seafood has become quite a challenge, especially here in the Midwest. Thankfully we have a few great resources at our disposal.  And, just because a product might come from another part of the country doesn't mean we can't still support local businesses in procuring said product.  I have learned a lot over the past couple of weeks, as I researched where to buy my Copper River Salmon this year, that will help me buy seafood in the future.  I had always thought that buying seafood from fisheries in the sourcing locale ensured I would be getting the freshest and most sustainable product.  I've discovered that that's not necessarily the case.

How can we make responsible seafood choices?
Thankfully we have a wealth of sustainably minded chefs and food producers in our area who can help us make better choices in our food consumption.  Fortune Fish Company in Bensenville, IL, is a leading seafood distributor servicing the Midwest who has made a commitment to quality, variety, freshness, service, and most importantly, sustainability.  I discovered that in addition to supplying various restaurants in town, they are the primary source for most of Metcalfe Market's seafood.

I spoke with Leah Caplan recently, Chief Food Officer at Metcalfe's, to learn more about their seafood buying program.  In recent years they have developed a beautiful system for educating the public on their choices for buying seafood, by ranking fish in the case as being "best choice", "good alternative", and "unsustainable".   They also provide information on the method of harvesting and whether the fish was wild caught or farmed.  After much research Leah decided that using the Monterey Bay Aquarium Seafood Watch criteria was the most unbiased and accurate system.  Monterey Bay Aquarium Seafood Watch also has many consumer tools available directly from their website in an effort to help us make wise seafood choices no matter where we are.  Metcalfe's Market currently has Copper River Sockeye in their fresh case.  They don't carry King, but will order it and many other things they don't routinely carry, if you just ask.  I have also personally had nothing but great interactions with the fishmongers who work in Metcalfe's seafood department.  They are always very knowledgable, friendly, and eager to serve.  Just like talking to the farmers at the farmer's markets about their growing practices, don't be afraid to ask the folks at grocery stores the same questions, holding them to your personal standards for food buying.


Now what?
Just like putting up fresh, local fruits and vegetables in the freezer at the peak of their season, when properly handled and packaged, your Copper River Salmon will store very nicely in your freezer throughout the next many months.  I highly recommend freezing it on a sheet tray in individual pieces and then vacuum sealing for longer term storage.  I am a Copper River King fan and my favorite way to prepare it is to keep it very simple.  Searing the skin to get it crisp and then cooking slowly under a broiler or on the grill with a light seasoning of salt & pepper, lemon pepper, or butter, lemon, and dill.  (This is one instance where you do not want to throw the skin away.  If you get it nice and crispy it is delicious and oh-so-good for you.)  The fish really doesn't need anything else and because it is so rich in healthy fats, it really doesn't even need much of any fat added during cooking.  Cook the fish until it just starts to flake, then remove it, cover with some foil and let it sit for a bit.  You don't want to overcook it, but you want it cooked through...just beyond the fleshy "rare" stage for most people.

Once you have tried Copper River King or Sockeye Salmon you will never look at pale farm raised and Atlantic caught salmon the same again.  King Salmon has about one more week in its season, so act now if you are looking to get your hands on some of this amazing fish!


Lemon Garlic Wild Salmon
(recipe included in one of my past Copper River Salmon orders from Wild Salmon Seafood, Seattle, WA)
2 Tbls butter
(2) 8oz salmon fillets-skinless (I leave the skins on)
2 tsp minced garlic
1 tsp lemon pepper
lemon wedges

Melt butter in skillet over medium-high heat and stir in garlic.
Season salmon fillets on both sides with lemon pepper.  
Place fillets in pan and cook 10 minutes per inch of thickness or until fish flakes when tested with a fork.  Flip fillets half-way through cooking to brown on both sides. 
Sprinkle with lemon before serving.


Sunday, May 27, 2012

Rhubarb Cocktails Anyone?

Offer me a glass of wine and surely I will oblige, but it wouldn't be my first choice.  Offer me a beer and I will likely stick with my glass of water...unless, of course, it is a beautiful Belgian beer from Brasserie V.  My first choice and true love is hard liquor.  I don't know if it's my Slovenian, German, or Irish roots (pick one, they all like to drink), or simply my midwestern upbringing, but I love a good cocktail.  Sometimes I like them clean and simple...A good whiskey with a good vermouth and a twist of orange.  And sometimes the crazier the better, think gourmet meal in a glass.  Cocktails can be tailored for every mood and occasion.

Every year when it comes time to preserve fruits and vegetables at the peak of their season I am always looking for new recipes and new ideas.  A couple of years ago my love for liquor took a new twist when I started playing with making some of my own flavored infusions. Last year during Rhubarb season I needed some inspiration and Nigella Lawson gave me just that.  I had reached my quota of putting up frozen rhubarb, sweet rhubarb sauce, and savory rhubarb brown sauce.  And though I love Rhubarb Kuchen, I'm not a baker and there's only so much one can do with rhubarb.  Through her cookbook "How to be a Domestic Goddess" Nigella tempted me with Rhubarb Schnapps and a new way for me to enjoy both rhubarb and liquor was born.  

Making infusions is so very easy and so very fun.  You just have to have a little patience.  
Since I have less than a little patience, I only let my first batch sit the minimum required 6 weeks.  When I strained it, it definitely had a nice rhubarb flavor but it was very mild.  I wasn't quite sure what to do with it as it's mild flavor wouldn't really hold up to other ingredients, so I only drank a small amount over the summer. Usually I had it with a little ice mixed with lemonade. It is true that things get better with age.  This spring I pulled out my Rhubarb Schnapps jar thinking I should probably drink what was left to make room for a new batch.  I am so glad I had some left over because it had gotten better over time.  The rhubarb flavor had intensified a little and the whole concoction had developed a smoother and richer flavor.

I was still on the lookout, however, for the perfect mixer.   Fate stepped in and while at Metcalfe's Market recently I stumbled upon Dry Soda.  This stuff is amazing!  It's all natural, just lightly sweetened (with pure cane sugar), and comes in array of interesting flavors.  I scooped up a 4-pack each of the Lavender and Rhubarb and couldn't wait to get home to start mixing.  The experiment was a huge success and I now have a new favorite early summer cocktail to enjoy!  I liked the Lavender and Rhubarb sodas equally well as they each brought something different to the drink.  Not being a soda drinker, I was also surprised to find that I enjoy drinking these Dry Sodas on their own.


Here is my adaptation of Nigella Lawson's
Rhubarb Schnapps


  • 1 lg bunch Rhubarb- sliced 1/4 to 1/2 inch pieces to make 4 C.
  • 2 C. sugar
  • Approx 4 C. vodka- you can use whatever cheap vodka you like (I used Tito's as it's one of my favorites and is small batch from Texas...if you're looking for a local vodka you will find it in Yahara Bay, Death's Door, 45th Parallel, Rehorst Premium Milwaukee, and Prairie Organic...all at a slightly higher price point)
  • 1 half gallon Ball jar with lid (these can be found at Farm & Fleet)


1.  Place sliced rhubarb in jar


2.  Pour in sugar, cover with lid, and shake vigorously to disperse sugar.


3.  Pour vodka over sugar & rhubarb until jar is filled to within an inch or so of very top.


4.  Replace lid and shake vigorously again.


5.  Place jar in cool dark place. Shake once daily for first week, then let sit for a minimum of six weeks and up to 6 months.


6.  After resting for desired amount of time, strain liquid.  Discard solids and reserve liquid back to jar, cover with lid, store in cool dark place and enjoy in moderation. :)


Rhubarb Cocktail

Glass, ice, 1 part Rhubarb Schnapps, 2 parts Lavender or Rhubarb Dry Soda.  Perhaps even add a few drops of Bittercube Jamaica #2 bitters.

(If you love making your own cocktails and are unfamiliar with Bittercube, you must check them out!)


Just for fun...here is another unique idea for using your rhubarb.  I got this recipe from a new friend, Amy K., who I met on a recent A World of Flavors Walking Food Tour in Madison's Atwood neighborhood.  (More on that another time)  She told me she makes Rhubarb Salsa and finds it to be a tasty alternative to traditional salsa this time of year.  She was gracious enough to share her recipe with me.  I haven't tried it yet, but thought it to be too interesting not to share.  Let me know what you think!!


Rhubarb Salsa
1 1/2 C. finely diced rhubarb
1/2  C. finely diced sweet bell pepper (use orange or yellow for a nice color contrast...and thanks to hoop houses, I actually saw yellow bell peppers at the farmer's market yesterday!)
1/2 C. diced red onion or green onion
1-2 diced jalapenos
2-3 Tbls chopped chives (if not using green onion)
Chopped cilantro to taste
Juice of 1/2 a lime
2-3 Tbls vinegar (I will probably use Apple Cider Vinegar)
1Tbls honey + 1 tsp sugar
a pinch of salt
The original recipe suggested adding ground cayenne or chipotle pepper to taste, but she had neither and says her family loved it without.


Toss the ingredients together in a bowl and enjoy!


Do you have an interesting and unique way of using rhubarb?  I'd love to hear about it!! 


Sunday, May 13, 2012

Move over Jack, there's a new Gouda in town.

This post is a public service announcement of sorts.  I recently discovered a relatively new cheese that must be shared....White Jasmine's Cumin Gouda.  Huma Siddiqui is a chef who specializes in Pakistani cuisine, author, entrepreneur, local TV celebrity, and now cheese maker.  She is a beautiful, multi-talented lady who you can learn more about on her website White Jasmine.  There you will find information about her local TV show, cooking classes, specialty Pakistani spice blends, cookbook, and cheeses (which came on the market in just the past year or so).

When I think of Pakistani food, the only cheese that comes to mind is Paneer, a mild white farmer style cheese.  When Huma's cheeses came on the market I didn't give them much consideration as I couldn't quite reconcile the idea of "Indian" spiced cheeses and how they might be used in my kitchen.  I'm sad to say, I was very closed minded to the unique product she had created.

Well, those days are over.  My mind has been opened and all thanks to Huma herself.  On a routine stop at Metcalfe's Market Hilldale this past Saturday, she was there sampling her Cumin Gouda.  In that place, at that moment, I was able to take her special cheese out of the little mental box I had placed it in and consider the possibilities.  Her Cumin Gouda is a creamy rich Gouda that explodes with the flavor of cumin and the heat of red chiles.  It is delicious and so unique!

I'm not traditionally a Pepper-Jack cheese eater.  It has its purpose in my life on one specific occasion, when I make my Squash Enchiladas.  I never eat it from a cheese tray, never choose it for my sandwich at the deli, and don't even use it in any other Mexican cooking I might do.  I'm also not generally a fan of cheeses that are boldly flavored with other ingredients.  I'm kind of a purist I guess when it comes to cheese.  I like good cheese for the sake of the cheese itself, not because it has a bunch of stuff added to give it flavor.  This is probably why I didn't give Huma's cheeses a closer look.  Her Cumin Gouda is not even in the same league as any Pepper Jack I've ever had, though that's the only class I can think to put it in for comparison.

Needless to say after my "aha" moment at the sampling station, I bought a chunk of the cheese and tonight it made a star cameo on my dinner of Borracho Beans and locally made corn tortillas from Mercado Marimar.   I can see this cheese joining future events in my kitchen in the form of quesadillas, grilled cheese & tomato sandwiches, on top of chili, and I think it will even replace Pepper-Jack on my Squash Enchiladas.  It may even show up on one of my cheese plates, which is a very coveted place of honor for any cheese. (I put a lot of love and thought in to my cheese platters).  I will bet money that when it shows up on one of my cheese plates it will be one of the first cheeses to disappear.

I am looking forward to trying her other flavors, Tandoori Gouda and Sajji BBQ, and hope you give them a look too.  If you do please tell me what you think and how you used them.  I hope you will be as excited by the Cumin Gouda as I was.


Sunday, April 29, 2012

One Kitchen, Two Kitchen, Old Kitchen, New Kitchen.


My blogger friend Sarah, at Sarah's Place, has been posting some beautiful kitchen design photos as she gets inspired to remodel her kitchen.  I found myself writing in her comment section a lengthy response of personal advice about kitchen remodeling and decided it might make a good blog post for those of you who might be considering the same venture.  I am always eager for others to share their wisdom with me if it means it might save me time, money, and/or hassles.  I hope my tips here will help you in the same way.

I had the fortune (or misfortune depending on your perspective) of doing a full kitchen remodel a few years ago and felt overwhelmed by the process.  I had had a few years to think about what I wanted, but it wasn't until I was really pressed for time that I was able to put together something I could enjoy for years to come.  Whether you are doing the project yourself or not here are some tips that helped me personally work through the maze of creating a new kitchen.

1. Keep a folder and notebook nearby so you can keep track of inspirational photos and jot down notes as ideas come to you about everything from what colors you like to where you wish you had an electrical outlet.

2. Talk to every person you know about their kitchen remodel (because nearly everyone has done it, or so it seems) and ask them what their favorite thing is about their new kitchen and if they had to do it over what would they change.  I got VERY valuable tips and learned from other people's oversights without having to learn from my own. :)

3. Don't be afraid to consult with local independent carpenters who do custom kitchens.  I thought this would be so far out of my price range that I didn't even investigate it at first.  I  got quotes for (custom) cabinets from local kitchen design stores and lumbar yards that I assumed would be more reasonable but were all much more expensive than I expected.  In the end I got a quote from Paul Morrison at The WoodCycle in Oregon, WI.  He was surprisingly more affordable and I ended up with the most beautiful, well made, well designed, unique, custom cabinets, all made with re-purposed local wood to boot!  He even used some wood from our own yard.  That's another story for another time but Paul helped make one of my dreams a reality.  He is an artist, craftsman, land steward, and all around good guy.

4. Be more mindful when you're in your kitchen.  Pay attention to how you use your space now and how you'd like to use it in the future.  What gets in your way, what changes might improve your efficiency and work flow (like electrical outlets and where the sink is in relation to the fridge & stove), and where does the flow of household energy get congested (like where the mail or your belongings tend to pile up)?  How do you use your appliances?  Do you need more space for containers or tall bottles in your fridge? Are there noises you hear (a really loud fan or dishwasher) or movements you make to reach for something or put something away that drive you crazy every time? These things may seem superficial but these are the little details that will add up to a lot when you are using a room day in and day out.  Jot these things down in your notebook (which I mentioned above) so that when it comes time to create a design and buy new appliances you will be able to pull it together pretty easily. Put asterisks by the things that are really important to you.  When you're sitting at a table with a design consultant or your cabinet builder you may forget what really mattered.  Your journal of ideas and reminders will become your design guide.  Be sure to reference it frequently during the process.

5. Go to every appliance store and kitchen design center you can.  Walk through them slowly taking it all in and be sure to touch everything and move around in the spaces as if they were yours.  I had my heart set on a gorgeous Dacor gas range with double ovens (a little kitchen porn just for fun).  I really wanted wall ovens but didn't think I had room in my design for them.  When I went to the store, however, to see one, I started "using" it and realized I really did not want to be bending and stooping to get in and out of my ovens all the time.  We ended up creatively reworking our design to make room for a single wall oven that I decided was more of a priority than two ovens on the floor.  If I hadn't gone to the store to actually "use" that range I would have spent a lot of money on something that I would have regretted buying for years to come.

6.  Lastly, and this tip applies to every home improvement project, spend the money to do it right the first time.  These projects can cost a lot of money and in the midst of the sticker shock you will be tempted to make compromises and settle for less than what you really want in order to save a little money.  Be reasonable.  You have to have a budget and know that you can afford your project but in the grand scheme of things the extra money you spend to do things right the first time and get what you want will make a lasting impression on how you love your new space.  The money will eventually become an afterthought but you will be stuck with your choices for a long time.

I'm sure much of this seems like common sense and largely it is, but sometimes we all have to be reminded.  Especially when we're faced with the enormous task of restructuring our home.  Hopefully there is something in here that will help you on your journey.  I spend a lot of time in my kitchen and  remodeling it was very stressful for me.  The space desperately needed improvement but I was almost paralyzed by fear that I wouldn't do it in a smart and cost effective way.  I wanted it to be my perfect space, and thankfully that's exactly how it turned out.

I love "before" and "after" photos and have never had a place to share mine.  So here they are.

Before 
(messier than usual as we had already started the packing up process)


After

No walls were moved but the space felt like it doubled in size

I especially love my repurposed window shutter pot rack

The cat ledge was put in specifically to keep the cats off the counter...it works! Much of the Hickory, particularly that seen here in the box-car siding was from a tree we had to remove from our front yard a couple years prior.

I couldn't be more proud of the amazing work done my husband and Paul and his crew. 


I love nearly everything about my new kitchen but if you were to ask me to identify my two most favorite things I would have to say my Kitchen Aid "garage" and my recycling center.  The appliance garage is a cabinet with an elevator shelf and interior electrical outlet that houses my very heavy Kitchen Aid mixer.  When I want to use it I open the cabinet door and lift the elevator shelf with my mixer on it.  The shelf locks in to place and because I leave it plugged in inside the cabinet (I know, not very "green" of me) it is ready to use in an instant.  When I'm finished the shelf gets lowered and tuck easily back in to place.  I had to sacrifice an entire cabinet for this purpose but for me that was a wonderful use of space.

One of my biggest issues with energy congestion was the piling up of mail on the counter.  To remedy this I designed a recycling station in an area that was convenient to where we go through our mail. It is a pull out drawer ala the pull out trash drawers, but this drawer has a bin for recycling paper and a second "bin" that has a paper shredder in it.  Another plus for working with a local independent carpenter...this isn't the only cabinet that he made uber-custom for me.  I put an electrical outlet in the cabinet for the shredder so it is completely self contained. I am happy to say that after 4 years of living in my new kitchen there is still nothing I would have done differently.  I owe much of that blessing to the tips I've shared above.


I'd love to hear about your kitchen remodel stories.  What tips do you share with others who are considering taking on such a project?  What are your favorite things about your new space?  If you had to do it over again what would you do differently?

Monday, April 9, 2012

Short & Sweet (and a little spicy)

Back in January I wrote about a mission trip I had been blessed to be a part of to Chiapas, Mexico.  I mentioned a Barbacoa de Pollo dish that had been my favorite of the trip and one that I was looking forward to recreating at home.  Tonight seemed as good a night as any to give it a try.  

I recently purchased a quarter of a lamb from my good friends at Windy Fleece Farm in Albany, WI.  Anna and Steve raise Navajo Churro sheep which are in the Slow Food U.S.A. Ark of Taste.  The U.S. Ark of Taste is a catalogue of over 200 rare regional foods whose existence is threatened by industrial standardization and environmental damage.  The list serves as a guide to farmers, producers, and consumers for celebrating and supporting the biodiversity of our country and cultural heritage.  It may seem counter intuitive to consume endangered breeds of plants and animals, but if there isn't a market demand for these items then there will be no incentive for folks to raise or produce them.  

The fresh meat in my freezer sparked some inspiration and I decided Lamb Barbacoa was on the menu for dinner tonight.  I am thankful to say that the end results were worth sharing.  Here's what I did.

Lamb Barbacoa

4 lb lamb shoulder or leg roast- cut in to large sections
1 med. onion- sliced
8 cloves garlic- smashed
14 dried, pitted prunes- cut in half
1 orange- halved and sliced
1 small jar lg green olives, pitted & halved
1/2 bottle red wine
1/4 C. Red Wine Vinegar
1 C. stock (veal, chicken, or beef)
1/2 tsp whole cloves
2 Cinnamon sticks
1 tsp Epazote, dried *from Penzey's
a few Avocado leaves *from a local Mexican grocery store
Dried Chiles: 
Guajillo x 4
Cascabel x 2
Ancho x 3
Arbol x 5
Salt
2 Tbls neutral cooking oil (pure olive oil, sunflower, avocado, grape seed)

Preheat oven to 325 degree.

Stemmed and loosely de-seeded chiles.

Heat a skillet over high heat.  Add 1 Tbls neutral oil, sear lamb on both sides til nicely browned.  Remove to covered baker.  

Reduce skillet heat to medium.  Add 1 Tbls neutral oil, add chiles to fry in pan.  When starting to brown add onions and garlic, sauté for a couple of minutes being careful not to brown the garlic.  

Deglaze pan with red wine scraping any bits (fond) off bottom of pan.  Add remaining ingredients except olives.  Simmer all briefly until softened and heated through.  

Pour skillet sauce over meat in baker.  Cover and place in oven to braise for 2 hours.  Add olives and cook for another hour.  Remove baker lid during last 30 minutes.  Remove baker from oven when meat is fork tender and remove meat to a platter.  

From remaining sauce remove large pieces of orange, avocado leaves, cinnamon sticks, any obvious cloves and discard.  Separate remaining ingredients and liquid from baker to a blender, leaving olives intact in baker.  Blend sauce on high until smooth.  Return sauce to baker with olives.  Shred meat with a fork or fingers and return to sauce.  Mix all together well.  


I served mine on a plate topped with a vinegary slaw made from red cabbage, red onion, pickled fennel, and cilantro.  I sprinkled crumbled fresh goat cheese (chèvre) from LaClare Farm on top.  You could also use a crumbly Mexican style cheese like Queso Fresco.  I purchased freshly made corn tortillas for less than $2 from a local Mexican grocery store and served them warmed alongside the Barbacoa.  The plates were garnished with slices of avocado.  


The sauce had a nice rich depth of flavor with acidic, sweet and spicy notes from the orange, prunes, and chiles.  The tender meat had a refreshingly mild sweetness, lacking the pungency characteristic to conventionally raised lamb.  It was an earthy and delicious dish that got "thumbs up" from the peanut gallery.  

Procuring the fresh Chèvre required a stop at my favorite specialty shop, Fromagination.  While there I splurged on something special for dessert.  Two tubs of Jeni's Splendid Ice Cream.  They had two new scrumptious flavors for me to try...Brown Butter Almond Brittle and Hummingbird Cake.  Jeni's ice cream is handmade in Columbus, OH using milk from grass-fed cows and ingredients local to their area.  Both flavors are delicious and worth every penny, but the Brown Butter Almond Brittle should not be legal and is now my new favorite bumping out the Lemon and Blueberry Frozen Yogurt.  


Friday, April 6, 2012

For the Love of Family Fun

We recently experienced a significant loss in our family.  My father in law, Bruce Henry, died unexpectedly on March 20th at the age of 64.  One collective assertion about Bruce was that he loved his family more than anything in this world.  Holidays spent with the whole clan were his greatest joy and his grandsons were the light of his life.  Each of his sons even cherished him as one of their best friends.  Bruce would hate for me to mislead you...he was no saint.  He was a master of tawdry jokes, could cuss like a sailor, and boy could he be a curmudgeon.  But his sense of humor, moments of playfulness, and extraordinary ability to elicit an eye roll or "red face" are irreplaceable losses for our family and those who knew him.  For many there are annual reminders of the physical loss of a loved one.  For us the reminder comes weekly as each Sunday now passes without his ritual phone call.  But death is an unavoidable part of this amazing journey we call life.  None of us will escape it nor will we escape the pain of losing those we love.  All we can do is live each day to the best of our ability making sure to love the people around us every moment.

Right after Bruce died I was feeling like it seemed wrong somehow to go on with our daily routine.  That life had to stop for a while out of some kind of respect for the life that was just lost.  To summarize some wisdom from a friend, we are all filled with a divine light. That light is in part a product of the input from the love in our lives and it is that light that makes us special to the people around us.  In order to honor the earthly loss of a loved one it is important that we go on living each day to our highest power allowing that light to shine.  It's an expression of love that we do so and it's how we allow our dearly departed to live on in us.    I found this immensely helpful and hope that it resonates somehow for you in your lives.

As a way to honor Bruce's love for his family, love for learning, and love of food I am excited to share this post with you.

My brother in law, his wife, and our nephews live in Oconto, WI, way "up north".  So far "up north" that we rarely get an opportunity to see them.  Ok, it's really not THAT far, but it's far enough that the craziness of our busy lives make it very difficult to get together.  In the past few years they have made a concerted effort to set aside a weekend to come visit. Their most recent visit was mid-February.  The long range plan was for them to come spend the weekend to go snowmobiling, as that's typically how the Henry family enjoys the winter months.  Well, as we all know...there was no snow this year.  So, now the pressure was on to plan something really fun.  My secret hope is that if they have so much fun when they come visit, they will make a point of coming more often. :)  Hmmm...February...Wisconsin...no snow...what on earth were we going to do?!  They surely didn't want to drive all this way just to sit around and watch movies all weekend...my favorite winter "sport".  My sister in law and I could easily have found plenty of shopping to be had and wine to be drunk to allow us to have a fantastic time, but throw two "manly men" and two teenage boys (ahem, young men) in to the mix and now what?


So I did what I always do when trying to plan something fun, I busted out my laptop and started perusing some of Madison's treasures and "what's going on around town" websites.  The State Historical Society, WI Veterans Museum, State Capitol, MMoCA, Overture Center, Alliant Energy Center, Olbrich Gardens, Arboretum, Historical Walking Tours, Madison.com, and the Isthmus's Daily Page all offered us possibilities, but nothing that really made our eclectic little group go "yeah, let's do that!".  This research definitely got my creative juices flowing and oiled up the creaky wheels in my brain.  I started thinking outside the "Madison" box and started wondering what fun we might be able to find in another nearby town.  There are so many great places to explore outside our city and it's rare that we (my husband and I) take to time to do so.  In the end we settled on Monroe and New Glarus as our destinations for a day trip of fun.

I was a little concerned that after their long drive down to our house on Friday that the last thing they'd want to do is climb in the car for another day of driving on Saturday, but they were game so off we went!  New Glarus and Monroe really aren't that far from Madison. Approximately 35 minutes to an hour respectively depending on your point of origin.


The first stop on our itinerary was the Emmi Roth Cheese factory (formerly Roth Kase).  I called ahead by just a couple of days and spoke to the ever amiable Tony Zgraggen.  Tony is from Switzerland and is the proprietor of the Alp and Dell storefront connected to the cheese factory.  With my fingers crossed, I asked if we could get in on a tour on Saturday and he said "Ya, when you want to come?".  The tours are free and perhaps because it was February we were able to state the time we wanted to come.  I didn't even have to give him my name to make the reservation, he simply said "You just come."  My conversation with Tony was the most heartwarming reminder of why I am proud to be from the midwest and why I am continually baffled by those who feel the need to poke fun at us.

We arrived at Emmi Roth for our 10 am tour, met Tony, and he promptly took us on our way.  We were lucky that this particular Saturday they were actually making cheese.  Tony escorted us to the viewing area where he shared the history, accomplishments , and production techniques of Emmi Roth and their award winning cheeses.  Emmi Roth is the only manufacturer of Gruyere cheese in the U.S., uses old world traditional production techniques, and makes all of their cheeses from locally procured milk.  As he spoke we were able to watch the process in action.  From here we moved on to the brining area where we got a bird's eye view of the cheese brining tanks and learned more about the cheese making and aging processes.  Our tour lasted approximately 45 minutes and ended back at the storefront where we proceeded to enjoy cheese and wine samples, perused cases of Roth Kase and imported cheeses, local beers, and all sorts of cheese paraphernalia including products for enjoying fondue and raclette.  This Swiss themed store is so charming and filled with such goodness we couldn't help but fill a couple of shopping bags.  As we began to say our goodbyes and thank yous Tony stopped us and said let me thank you in the proper Swiss fashion.  He busted out the most beautiful and impressive yodeling song that we all just stood in awe.  I couldn't help well up a little at the kindness and morsels of Swiss heritage we had just experienced.  

Next up was Baumgartner's Cheese Store and Tavern for lunch.  A very short drive in to the heart of Monroe brought us to the very charming city square.  Another foray in to Wisconsin history and Swiss tradition, Baumgartner's has been around since 1931 and is as charming as ever with it's saloon/Old World feel.  We grabbed a corner booth near the front window where we could admire the tavern in it's entirety.  If you are observant you will quickly notice that the wood slat ceiling is covered in greenbacks.  Our gregarious server asked if we wanted to see how they got there.  Naturally we said "yes" to which he replied "it'll cost you a dollar and a quarter".  We had a blast seeing our money get plastered to the ceiling.  You'll just have to go for yourselves to see how it's done.  The best part about the money on Baumgartner's ceiling is that every two years during Green County's Cheese Days festival the money is collected from the ceiling and given to a local charity.  Our server said that usually every denomination is represented and in 2010 over $6,000 was removed from the ceiling and donated.  That's pretty impressive.  More of those endearing midwestern values.

  
Greenbacks on the ceiling of Baumgartner's

My main objective for lunch at Baumgartner's was to get my fill of a Limburger and braunschweiger sandwich and to get my family to all take a bite.  Another fun factoid about Wisconsin cheese is that Chalet Cheese Co-op in Monroe, founded in 1885, is the only producer of Limburger cheese in the U.S., and I am a huge fan.  Baumgartner's menu is pretty simple, but they put out solid Wisconsin fare with many of the ingredients being made in house or locally procured.  You will then be able to wash down your wonderful lunch with locally brewed beer.  I highly recommend that when you go you order a Limburger sandwich for the table and the kitchen will kindly cut it in to bite sized pieces for everyone to sample.  Be sure to add a dollop of their house made mustard.  Remember, you're building memories...don't let fear get in your way.  

After lunch we made the short 1 block trek to Minhas Brewery.  Minhas Brewery began as Monroe Brewing Company in 1845.  It has since undergone many owner and name changes bringing us to its current day status.  In 2003 the brewery began making beers for Ravinder Minhas on contract for export to Canada.  The Minhas family has quite a brewing dynasty in Alberta, Canada, where they produce Mountain Crest, Canada's top selling beer.  This new arrangement increased the production of the brewery by 5 times and ultimately led to the purchase of the brewery by Ravinder and Manjit Minhas in 2006.  The brewery has continued it's expansion over the years with more plans in the works.  So far this progress has been done with sensitivity to the people and city of Monroe and has been an asset to the economy of the town.  The people at Minhas put on one heck of a tour.  The brewery is the proud owner of one of the largest collections of beer memorabilia in the U.S. all for perusing at your pace.  In the tasting room you are given a large "tasting" glass which is yours to keep and you are offered bottomless samples of all the beers and sodas they produce.  Yes, that's right, I said "bottomless".  In an effort to be diplomatic, they make very good root beer.  Wisconsin makes some amazing beers and it's perfectly okay that most of Minhas beer is exported to Canada.  After a short movie on the history of the brewery you are taken on a very inside tour of the production, canning, and storage areas of the brewery.  The tour guides are very informative and interactive encouraging lots of questions.  After the official tour you are welcome to go back to sample more beer and soda, walk through the museum and shop to your heart's content in the gift shop.  Before you leave don't forget to pick up your free variety 5 pack of beer and soda to take home.  All of this for just $10 per person.  The actual tour takes about 30-45 minutes but plan to spend a couple of hours to partake in all of the other activities.


Next on our itinerary was a stop in New Glarus.  New Glarus is a charming  Swiss town conveniently located between Monroe and Madison on Hwy 69.  Though I've always wanted to tour the New Glarus brewery that would have been a bit much for one day.  Our plan was to head to the Glarner Stube for an early dinner.  The Glarner Stube is probably my favorite restaurant in New Glarus and when I go I have to have the cheese fondue and Roesti potatoes.  It's a fat and carb fest for sure, but oh so delicious!  The Stube has amazing food across the board, so order whatever speaks to you.  Our plans were dashed however when we discovered that the owners were on their annual winter vacation, so the Stube was closed, for the month. In order to kill a little time and come up with an alternative plan my sister in law and I skipped a couple of doors down to the New Glarus Primrose Winery where we partook in a bar style wine tasting.  The boys, well they had to sit and pester one another while they waited.  The wine inspired us to go home and throw together a fondue dinner of our own.  We had already purchased some Gruyere cheese and swiss fondue chocolate at Alp and Dell and a short stop at another shop in New Glarus stocked us with some bread, and Appenzeller and Emmentaler cheeses (also produced in Monroe by Edelweiss Creamery).  We were on our way!

Cheese & Chocolate fondues with roasted veggies, bread, and fruit
Clearly we had a long and adventurous day.  A fun dinner together at home was the perfect way to bring such a day to a close.  We laughed, built memories, learned, stepped outside our "usual", and had so much fun together.  Our time together embodied the ideas I mentioned above about making moments count with the ones we love and letting our inner light shine every day to honor those who love us, living and dead.  Bruce was clearly present that day in the jokes that were told and the way his boys ("young" and "old") all interacted with one another, and he will continue to be present throughout the rest of our lives.


I hope you all make some time to spend with your families and remember there is a lot of fun to be had just outside your door.  You don't have to go far and it doesn't have to cost a lot of money.  The day I described above is just the tip of the iceberg in terms of what is available to us in our area.

For fun let me tell you about one of my favorite websites and grilled cheese recipes.  The  Grilled Cheese Academy is a fun, interactive way to get creative with grilled cheese.  Apropos to my post is my favorite sandwich in this mix...The Monroe.  It is a delicious blend of bacon, caramelized onion, sautéed spinach, fig jam, and Limburger cheese.  If you have been afraid to try Limburger but are curious, you will become a convert after you try this sandwich...I've seen it first hand.  The Grilled Cheese Academy is currently hosting a 2012 Grilled Cheese Recipe Contest.  The prizes are exceptional and the contest ends on 5/8/12.

The Monroe 
(as published by the Grilled Cheese Academy)

Ingredients

No. of Servings: 4

  • 8 thick slices bacon
  • 1 yellow onion, thinly sliced
  • Salt and pepper
  • 2-3 tablespoons water, divided
  • 8 tablespoons butter, divided
  • 10-12 ounces fresh spinach leaves
  • 4 whole-grain baguettes
  • 4-8 tablespoons fig jam or preserves
  • 8 ounces Wisconsin Limburger cheese, sliced

Cooking Directions

Heat large skillet or sauté pan over medium-high heat. Add bacon and cook until browned and crispy. Drain on paper towels; set aside.
Reserve 2 tablespoons of bacon grease in pan and return to heat. Add onions and pinch of salt and pepper. Sauté onions 5 minutes, stirring regularly. Add 1 tablespoon water, stirring to deglaze pan; stir in any browned bits. Remove onions to bowl.
Return pan to heat and add 1 tablespoon butter and 2 tablespoons water. Bring to simmer and add spinach and pinch of salt and pepper. Cook for 3-5 minutes to wilt the spinach. Remove spinach to a bowl.
Heat a grill or grill pan over medium-high heat. Split whole-grain baguettes. Assemble sandwiches: On each baguette bottom, spread 1-2 tablespoons jam, 2 ounces Limburger slices, spinach leaves, onions, 2 slices of bacon, and baguette top, in that order. Carefully turn the sandwiches over and butter the bottoms. Place sandwiches, bottom-side down on hot grill, then butter the tops of the baguettes. When bottom sides are golden and cheese starts to melt, carefully flip sandwiches and brown sandwiches tops, melting the cheese.

Wednesday, March 7, 2012

Friends, Start Your Gardens!


It's that time!  The light at the end of the winter tunnel.  For many the seed catalogs have been piling up, orders placed, and now it's time to get to work.  Spring really is just around the corner!

My husband and I grow a lot of our own food every year (at least from the plant kingdom), but I don't consider myself to be much of a gardener.  I can't keep a house plant alive to save my life, but somehow I manage to have a slightly green thumb with the plants that grow outside. Though I never gave it much thought as a kid, having a vegetable garden seemed inevitable for me.  The family who I spent much of my formative years with, while mom & dad worked, had a giant garden (at least in the eyes of a child) and did a lot of canning and freezing all summer long.  My paternal great-grandparents were homesteaders and my maternal grandparents had a garden as did my aunt & uncle on that side.  These same family members also took the time to process and preserve the fruits of their labor each season.  As my brother and I became more "responsible", we put in a family garden of our own.  Growing our own vegetables was always kind of a fun venture, though I never really spent much time out there.  

It wasn't until after I graduated from college that the urge to grow food struck.  As I moved from one rental house to the next I was thankful to have landlords who let me plant tomatoes, peppers, herbs, and whatever else I could fit on small strips of otherwise unused scraps of yard. It was so rewarding!

A common theme with the gardens of my youth was that they all existed within city limits on average sized city lots.  You don't have to live in the country to grow your own food.  As the slow food movement continues to grow, more and more community gardens are sprouting up all over. (Pun intended!)  If you're unfamiliar, a community garden is an area of otherwise unused land with public access that an ambitious cluster of folks organizes in to plots for their neighbors to use for their own growing needs or to feed the less fortunate.  Troy Gardens is a noteworthy example in the Madison area.  

If you are interested in growing some of your own food but feel intimidated, don't.  It can be as easy as planting a pot of herbs on your front step. Start small and you will ensure your success.  We can grow a surprisingly large bounty on a very small amount of real estate.  All you need is dirt, sunshine, water, and a plan.
  

Willy Street Co-op just published a fantastic article in their March 2012 "Reader" entitled "Container Gardening for the Urban Farmer".  The article is chock full of easy to digest information on how and why to grow your own vegetables, no matter where you live. Willy St Co-op also offers community classes on a variety of gardening topics this time of year.  One of my favorite resources is "Wisconsin Garden Guide" by Jerry Minnich.   That was my go to reference when I first really got in to vegetable gardening.  Mother Earth News has been helping homesteaders since the 70's. Their publications are relevant for city and country dwellers alike.  You can access most of their articles online for quick reference.  For the serious gardener they also offer an online gardening tool that helps with your planning.  Finally, many local universities offer classes and information through their horticulture departments.  Here in Madison we have a wealth of information available through our UW Extension programs.  And the UW West Research Center has trial gardens that are free and open to the public as well as special events for families focused on helping us all learn how to garden.  


In my experience the most rewarding vegetables to grow when first getting started are tomatoes, peas, green beans, and herbs (basil, parsley, chives, dill...) Nothing snazzes up an ordinary dish throughout the summer months like fresh herbs, especially when they come from right outside your door.  A pot of cherry tomatoes can be more fun than a candy store. And climbing vines of peas and green beans take us back to childhood fairy tales, never mind the delicious fun of eating these legumes right off the vine.  

A warm place for a nap.
If you had hoped to start your own seedlings for an anticipated summer garden, now is the time to get them in their little dirt incubators.  I have come full circle with this.  I used to buy all of my seedlings. Then I slowly began growing my own until one year I purchased an indoor collapsible greenhouse and grew all of them myself.  There definitely is something very rewarding about playing a part in the creation of new life.  Seedlings are a joy from start to finish, but I discovered that growing all of them myself became a more daunting task than I was interested in.  Gradually I cut back and now I'm back to buying my seedlings and taking in the orphans of friends' efforts.  

Whether you are starting your garden from seed or buying plants be mindful of your sources.  Just as with food, you vote with your dollars.  Buying seeds and plants that originate from Monsanto and other unethical corporations just continue to feed these maleficent giants.  There has been a lot of controversy in the media about Genetically Modified Organisms (GMO) when it comes to our food system.  In my humble opinion there is no controversy and the answer is clear.  Monsanto and the GMO "food" they are pushing serves only one purpose and it is not the welfare of our health or environment.  It is about global control and greed.  Whether you agree or not, in an effort to support our own local economy the ideal source of your seeds and seedlings would be from a local farmer or nursery that you trust.  Early in the growing season our local farmer's markets are filled with seedlings ready for our gardens.  It's okay to ask them where they get their seeds so you can make the best choice for you and your family.  Here is a useful article from GroEdibles where you can see Monsanto owned companies and find a list of businesses from whom you can buy Monsanto-free seeds.  

If your ambition takes you beyond a few containers on your back porch, a helpful tip I highly recommend is keeping a journal.  It doesn't have to be fancy, but it will make our efforts easier as you garden from year to year.  I have a ring binder with blank paper and folders.  I keep track of the varieties I plant, where I bought them, plant and harvest dates, and problems I encounter.  The folders in my binder are for helpful articles and pages from books I want to reference again.  Our garden is 30 ft x 22 ft (fairly sizable) so I also draw out a simple diagram of my planting rotation year to year.  It makes my life so much easier when life is a little more hectic and I find time to plant when I can.  Last year I tried a different journaling technique.  I took a wall calendar that I otherwise had no use for and did my journaling on it.  Now as I make plans for this growing season I can see month by month at a glance what I need to be doing or should be expecting.   My calendar journal reminded me that I wanted to write this post!

Locally owned gardening centers, such as Johannsen's, can be not only great resources for  supplies but also a wealth of information.  And though you may be tempted by the siren songs of high priced fancy gardening equipment, having a garden doesn't have to be expensive.  The goal, really, is to save you money in the long run.  Naturally, if you decide to get more serious about gardening you may want to upgrade to nicer equipment as your budget allows, but to get started old kitchen tools and garage sales will suffice .  Pea and Green Bean vines don't know the difference between decorative wrought iron trellises or old window screens propped up with 2x4's.  

If you are looking to advance beyond container gardening, but are still feeling overwhelmed by the idea of getting a garden started, Madison FarmWorks offers some amazing services.  Consultant, Megan Cain, came out to help us last year solve some problems we were having.  She was friendly, knowledgeable, and right on with her solutions.  They will work with you on meeting your needs from plot location all the way up to installing your garden and tending it for you.  These folks are responsible for the beautiful community garden now located on the capitol square. 

I'm not going to try to convince you that gardening isn't a lot of work.  It certainly can be and to be honest it's not even something that I love to do.  The rewards however outweigh the costs, which is the part that I do love.  The joy of supplying my small family with nutritious food that was grown out of our own efforts is addictive.  As is the feeling I get when I support local farmers who do it for me.  If you aren't interested in growing food for yourselves, even on a small scale, please consider joining a CSA and/or shopping your local farmer's markets when available (now is the time to sign up for a 2012 CSA).  Last year I scaled back our garden and found a nice balance that works for us.  We grow some things, get some from a small CSA share, and shop the farmer's market for anything additional. Find what works for you and reap the rewards that home grown food can bring.  I have been growing food for the past 20 years,  and am by no means an expert on vegetable gardening, but if you have questions please post them in the comments and I will do what I can to help.  

My 2011 pantry


On a side note, I have to send a warm thank you to Sarah of Sarah's Place.  Being new to the blogoshpere, I have a lot to learn.  In her February 22, 2012, post,  "Urban Hallway & Sharing an Award", Sarah nominated me (along with 4 others) for a Leibster Award.  I was shocked to receive such an accolade.  I love Sarah's blog and find her approach and interaction with her followers to be inspiring.  According to Sarah, the Leibster award was originally meant for newer blogs- those with fewer than 200 followers.  With just 7 "followers", I definitely qualify. ;)  When writing these blog posts it's hard to know what my audience thinks or if anyone is even reading.  Sarah's nomination gave me a nice boost of confidence and I thank her for that.  
The guidelines for accepting this award are:
  • Show your thanks to the blogger who gave you the award by linking back to them.
  • Reveal your top 5 picks for the award and let them know by leaving them a comment on their blog.
  • Post the award on your blog.
  • Bask in the love from the most supportive people on the blogsphere – other bloggers.
  • Most of all – have fun and spread the karma.
Sorry to keep you in suspense, but I am going to reserve my top 5 nominations for a later date.
Thanks again Sarah, and thanks to all of you for reading!